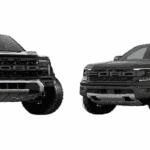
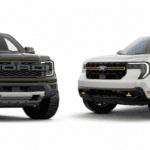
Jun 15, 2021

When you need your spare tire, the last thing you want is to discover that you can’t access it because you don’t know where the key is to release your spare tire hoist. This can be of particular concern if you have a used Ford F-150 whose original owner lost the key or failed to hand it over during the sale.

If you’re trying to take out your spare tire only to discover you lack the key you need, there’s good news. Getting around the spare tire lock is a simple process that requires just a few basic car repair tools. Follow these steps and you’ll have your spare tire free and on your truck before you know it so you can get back on the road.

1. Gather Your Tools

Before getting started, it’s helpful to gather all the necessary tools together so they’re readily available for access while working on the car. When choosing a socket, opt for an inexpensive variety. The removal process requires the socket to contort around the lock, so choosing a cheaper socket makes it just as easy to achieve and does not damage your best 14 mm socket. To remove your spare tire, you’ll want:

  • 14mm socket
  • Extender, at least 2 feet
  • Hammer
  • Ratchet wrench
  • Flathead screwdriver
  • Crank
  • Blocks (optional)
  • Jack (optional)

2. Park on a Flat Surface and Secure the Truck

When removing the spare tire, you will need to strike your tools in a manner that can cause the truck to rock. If you do not effectively secure the truck, this can lead to an accident when it rolls. If possible, park on a flat space. Engage your truck’s parking brake to decrease its ability to roll, and consider using blocks on the tires to further secure your truck, particularly if you decide to elevate the truck.

3. Secure the Socket to the Lock

To locate the channel to release your spare tire, look for a small hole in the rear fender of your truck to the left of the license plate. This hole leads to a tube that will guide your tools to the locking device. Although the locks used to secure a Ford F-150 spare tire to the body of the truck are not a perfect match for a 14 mm socket, they are close enough that you can make a standard 14 mm socket work. Attach your socket to as many extenders as you need to reach the locking device.

Using a hammer, gently knock on the other end of the extended device in order to drive the socket onto the lock. Because the shape of the lock is nearly the same as a 14 mm socket, by adding the percussive force of the hammer you can force the socket to deform in order to envelop the lock. You should see and feel your extension moving in beyond the point where it initially met resistance.

Securing the socket to the lock should not require extreme force. Start with gentle taps and increase the power of your blows if needed until you feel the socket latch onto the lock.

4. Crank to Release the Spare Tire

Now that your socket is attached to the locking device, you can use it to release your spare tire. Attach a ratchet to your socket extension and begin cranking. If the socket has adhered to the lock, you’ll see the tire begin to lower down. Continue cranking until you have fully released the spare tire and can remove it from under the truck. As you pull out the extension, you’ll notice that the socket is no longer attached to your extension and will need to be retrieved.

5. Raise the Truck if Needed

Before moving on to the next step, you may choose to elevate the rear of your truck, as you’ll need to get underneath your truck. If you’re able to fit comfortably and safely under your tailgate without elevating, you can skip this step and move on to clearing the socket.

When elevating the truck, it’s particularly important to double check that your truck is firmly secured, both with a parking brake and blocks or other stabilization devices. Securing your truck before elevating ensures that it will not shake or slip off the jack while you’re underneath, which can be dangerous.

If you’re removing your spare tire, it’s likely that you intend to put it on on your truck right now. If that’s the case, make sure to loosen the lug bolts on the tire being removed prior to lifting your truck in order to make it easier to gain the leverage you need to loosen them.

6. Clear the Socket

Once underneath your truck, look to the area where you inserted the extension. You should see a plastic tube running from the bumper to the spare tire housing. This tubing serves to steer your extension into place when inserted and can be moved out of place by hand without any special tools. Once removed, look for the socket and lock on the spare tire housing. Using your flathead screwdriver, gently pry the socket loose.

7. Raise the Spare Hoist

With the lock assembly removed, your vehicle’s crank should now be able to raise and lower the spare without any special tools in the future. If you’re replacing your spare, place it on the spare tire hoist before reversing your crank to raise it safely back up into the housing. If you have not yet purchased your replacement spare tire, simply raise the assembly with no tire to allow for safe driving.

Wendle Ford is Spokane’s premiere Ford dealership, so we know how much Ford drivers love their trucks. We hope this guide has helped you get the most out of your Ford F-150. If you’re interested in getting a new or used Ford F-150, Wendle Ford is the place to go, so get in touch or come out to see us today and see what we have to offer on our lot.